
Composter — how to start from scratch (beginner's guide)
I have a composter in the Bieszczady Mountains that during its first season did exactly what a composter shouldn't do: it stank, attracted clouds of flies, and one morning it turned out someone had dug a tunnel in it. Magda looked at it all, then at me, and just said: "Well, there you go." Cirí — as befits a Head of QA — walked around the pile, sat down next to it, and refused further cooperation.
MarekZ
Today, two seasons later, that same composter gives me several wheelbarrows of dark, forest-scented soil for free every year. Not because I learned some secret art. Because I understood a few simple principles and stopped treating compost like a trash bin where you can throw everything. If you're starting from scratch — this text is a list of things I had to learn through trial and odor.
Why bother with compost at all
From a programmer's perspective, a composter is the simplest system in the world: you input waste, you get fertilizer output, and in the middle, an army of bacteria and fungi does the work for you that you don't have to pay. There's no magic or expensive technology here. But there's a great deal: instead of hauling away peelings and mowed grass, you turn them into something you'd normally pay for at the garden center.
Then there's the unromantic but true part: less trash to throw away, better soil structure in your beds, and plants that simply grow better. After my first year of composting, my tomatoes stopped looking like victims of my gardening and started looking like plants. That was motivating.
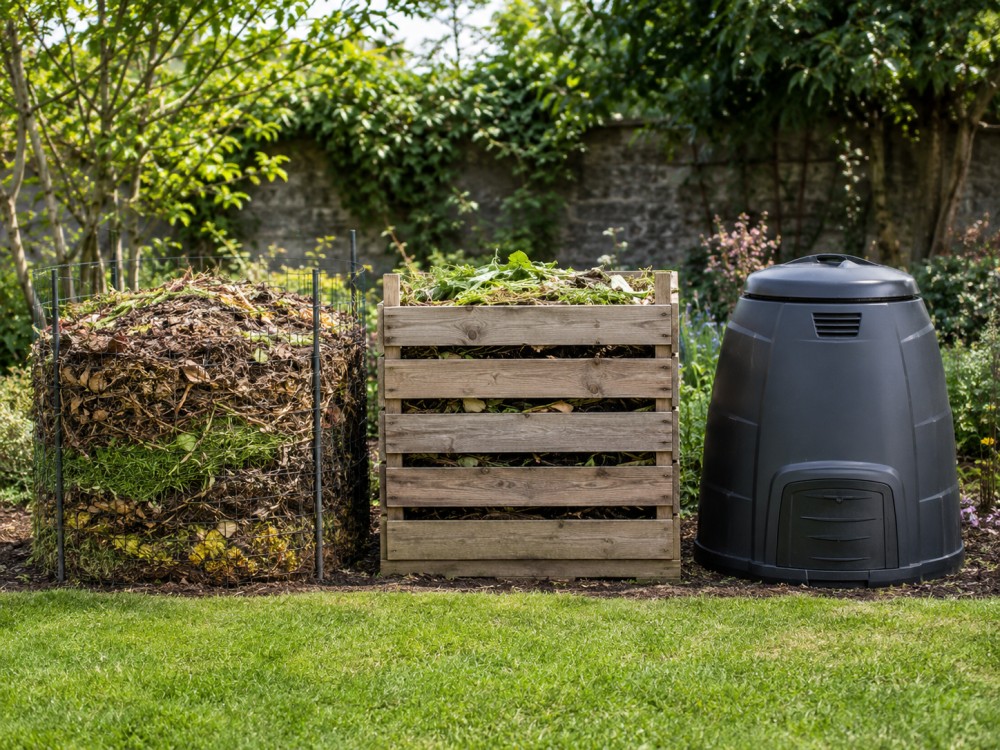
Three types of composters — which one for you
Before you start throwing anything in, it's worth choosing a form. There are basically three schools, and each makes sense in different situations.
1. Pile — or "just a heap"
The cheapest option because it costs zero. You choose a shaded corner of the garden, sheltered from wind, and pile up material there. It works, decomposes, and is natural. Downsides? It looks messy, dries out in summer and freezes in winter faster than enclosed forms, and uninvited guests get into it most easily. Good for large plots where space doesn't matter and the sight of a pile doesn't bother anyone.
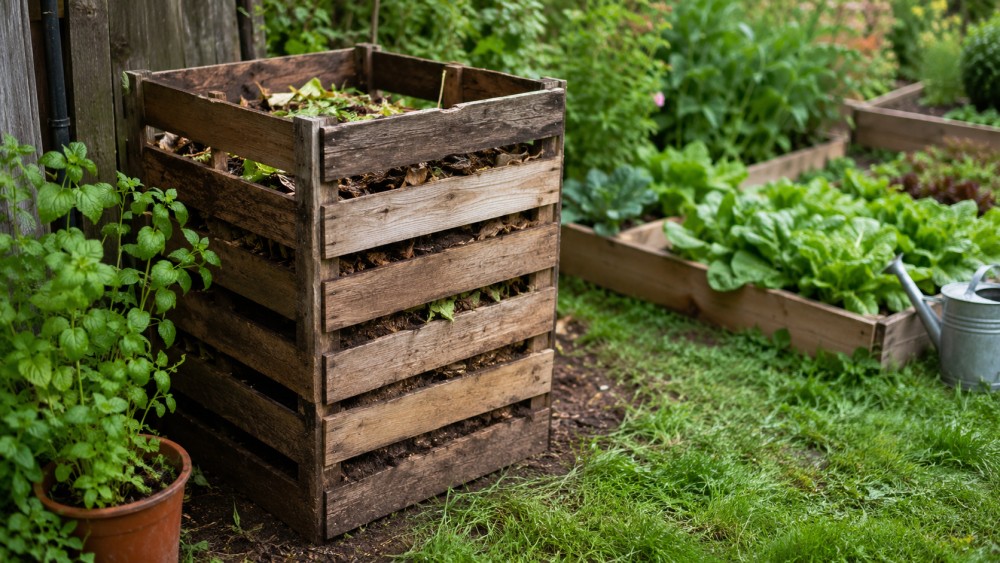
2. Wooden box (e.g., from pallets)
My favorite and what I have in the Bieszczady Mountains. Four walls made of boards or pallets, slatted so air can access, one removable wall — and that's it. The material doesn't scatter, it's easy to turn over, and the whole thing looks tolerable. Building such a box is a one-afternoon project and about as many screws as I usually lose when assembling anything. Perfect for medium-sized plots.
3. Plastic thermo-composter
A closed container, usually shaped like a beehive or barrel, with a flap on top and a hatch at the bottom. It holds heat and moisture, so decomposition goes faster, and it's harder for rodents to get inside. It looks neat, so it's also suitable for small gardens and where neighbors peek over the fence. Costs from about a hundred zloty upward. If you have little space and care about tidiness — this is the one.
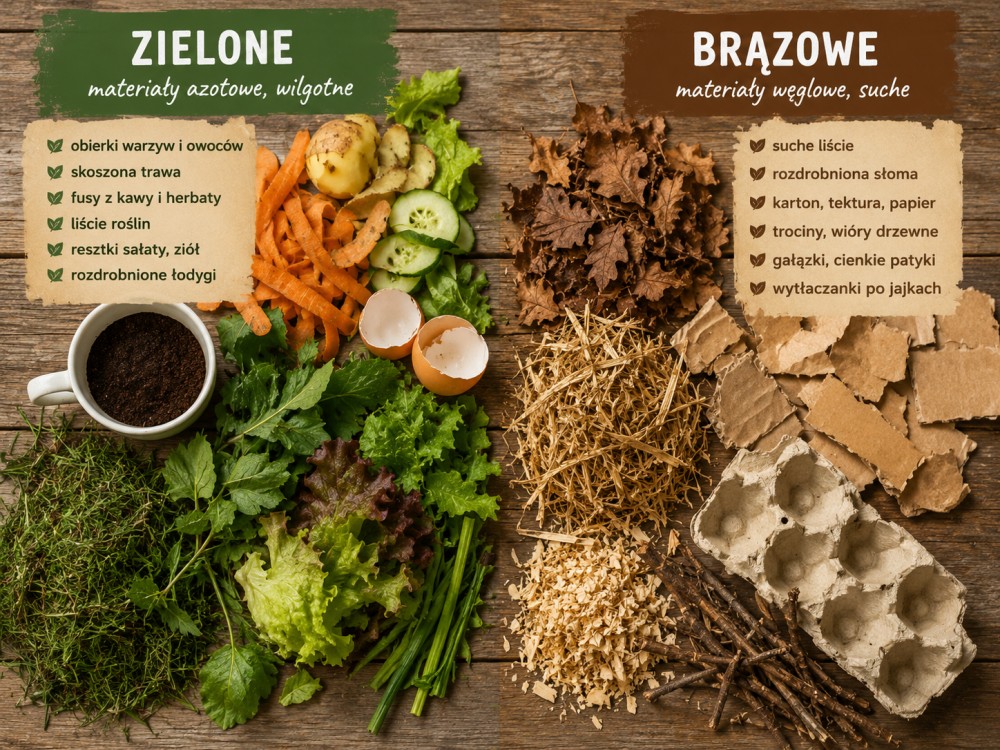
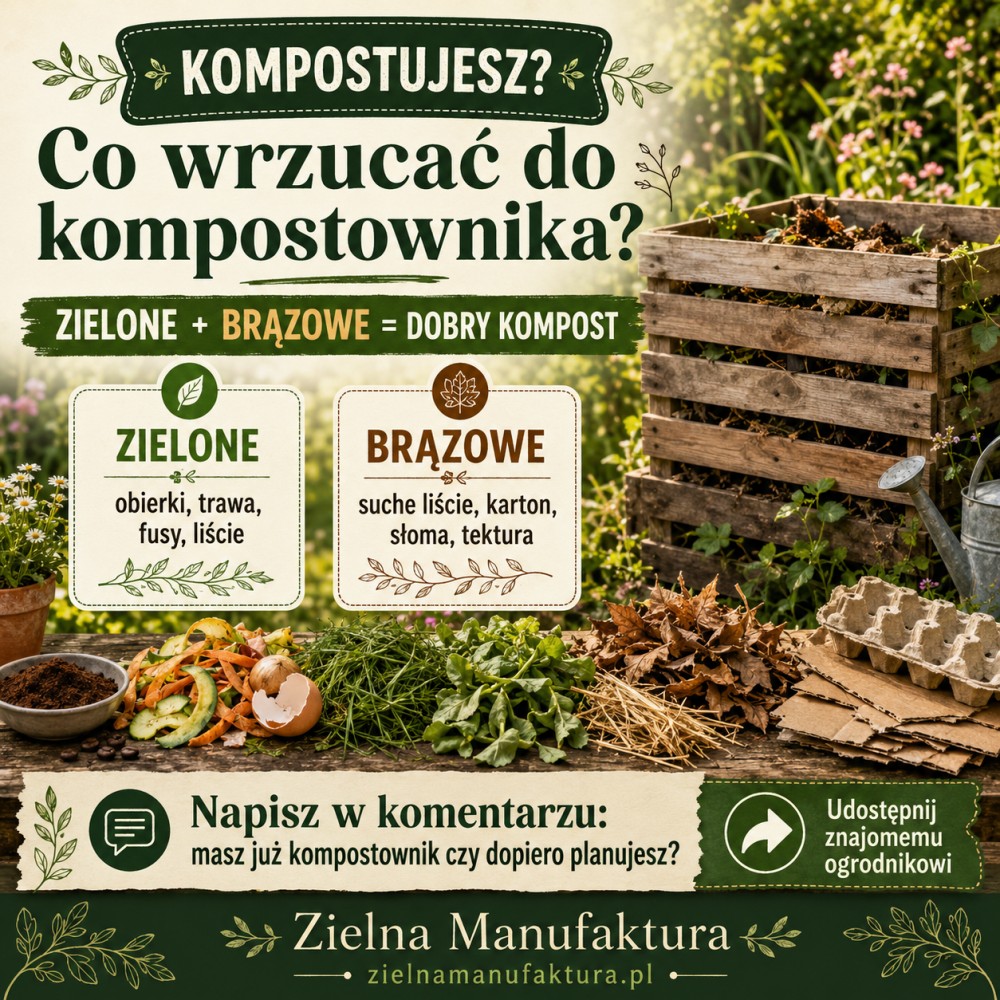
C:N ratio, or the magical 30:1
This is that one configuration parameter that changes everything, which nobody tells beginners about. Bacteria in compost need carbon (C) and nitrogen (N) in the right ratio for life — approximately 30 parts carbon to 1 part nitrogen. Sounds like chemistry, but in practice it comes down to one thing: mix "browns" with "greens".
- Browns (carbon): dry leaves, straw, cardboard and paper (not printed in color), egg cartons, shredded twigs, sawdust. These are dry and stiff materials.
- Greens (nitrogen): mowed grass, vegetable and fruit peels, coffee grounds, fresh weeds without seeds, kitchen scraps. These are moist and soft materials.
The practical rule I use so I don't have to calculate anything with a calculator: for one part green, add roughly two to three parts brown (by volume). My first compost stank precisely because I threw only mowed grass and peelings into it — all "greens," zero "browns." It's a bit like code made up of only function calls without any error handling: works until the first problem. A handful of dry leaves or a piece of torn cardboard fixes this instantly.
What's allowed and what's forbidden
The list of welcome items is long and pleasant: vegetable and fruit peels, coffee and tea grounds, eggshells (crushed), plant remains from the garden, leaves, mowed grass (in moderation), straw, cardboard, unprinted paper, nut shells.
The forbidden list is shorter, but sticking to it saves lots of problems:
- Meat, fish, bones, dairy — they rot, stink, and attract rats like a dinner bell.
- Cooked food scraps, fats, oils — for the same reason.
- Diseased plants and weeds with seeds — because you'll spread the problem throughout your garden along with the compost.
- Carnivorous animal droppings — here I regretfully inform you that Cirí's contribution to the project must remain purely supervisory. We don't throw litter boxes into compost.
- Colored, varnished paper and coal ash — too many chemicals.
The rest is common sense. If something was once a living plant and isn't diseased — most likely it's fine. If it comes from a dinner plate — probably not.
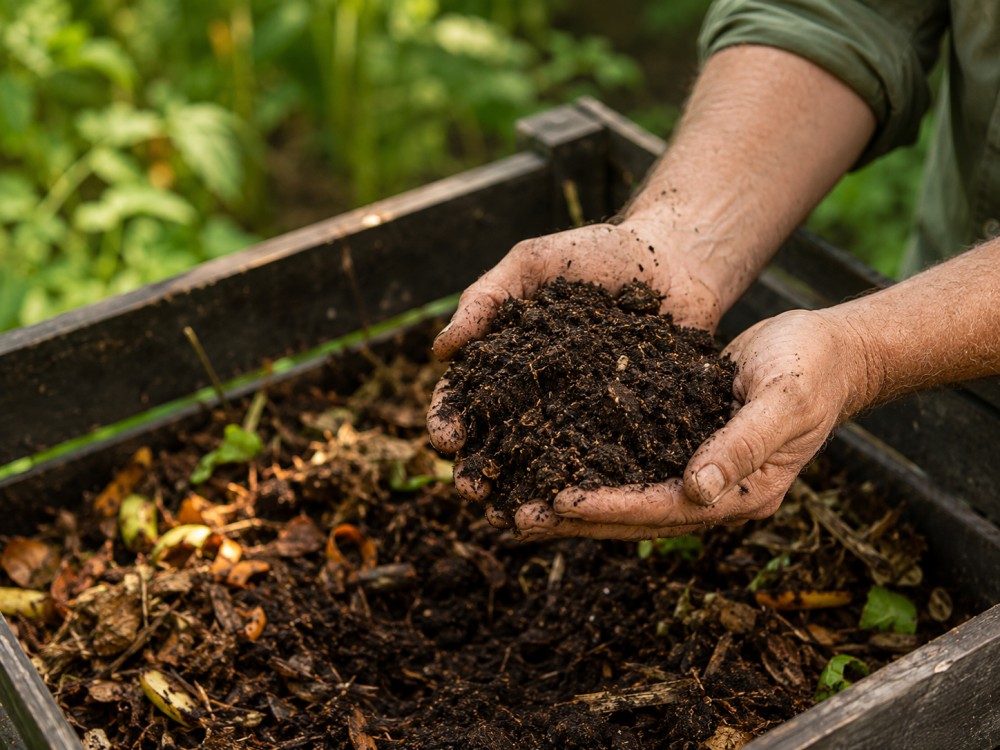
The first three months — what to expect
Here I have to spoil the fun a bit: you won't make finished soil in three months. During my first season, I peeked inside every two weeks hoping to find ready fertilizer, and each time I found the same thing I threw in, only sadder. Patience here isn't a virtue, it's a system requirement.
Realistically it looks like this:
- Month 1: with a well-balanced pile, the center starts heating up — that's bacteria getting to work. If you put your hand in (carefully) and feel warmth, it means everything's working.
- Month 2: time for the first turning with a fork. You mix to aerate and move outer layers to the center. Watch moisture — compost should be moist like a wrung-out sponge, not wet, not dry.
- Month 3: material clearly shrinks and darkens, but you'll still recognize what was what. That's normal. Full, crumbly, fragrant soil takes 6–12 months at a relaxed pace, faster in a thermo-composter if you turn regularly.
The most important thing you can do during these three months: maintain moisture and turn it once in a while. That's all. The rest happens by itself.
Three classic problems: stench, flies, rats
I've personally experienced each of these three. The good news is that each has a simple cause and an even simpler solution.
Stench
Proper compost smells like earth and forest. If it stinks of rot or ammonia, it almost always means one thing: too wet and too much "green," making it anaerobic inside. Fix: add a handful of "browns" (dry leaves, cardboard), turn thoroughly to let air in. For me, the stench disappeared within two or three days of adding leaves.
Flies and gnats
These swarm to exposed kitchen scraps. The secret is banal: don't leave food on top. Cover each portion of peels with a layer of "browns" or mix deeper. In a thermo-composter with a lid, the problem practically disappears by itself.
Rats
My Bieszczady tunnel was a lesson. Rodents come for two things: food and warmth. You handle the first by not throwing in meat, dairy, or cooked scraps. The second — by choosing a composter with a bottom or placed on fine metal mesh that prevents tunneling. Since I switched to a closed box with mesh underneath and stopped feeding the neighborhood with dinner scraps, the problem disappeared completely.
In conclusion
Composting is one of those things that looks complicated until you start — and then it turns out the whole philosophy fits in three sentences: mix browns with greens, keep moisture like a wrung-out sponge, turn occasionally. The rest is patience and accepting that nature has its own pace and doesn't care about your deadlines.
If you're starting your first composter this season — let me know in the comments what type you chose. And if something starts stinking in a month, come back to the stench section. We've all been there.
Hi, I'm Marek — a programmer from Warsaw who spends the growing season in the Bieszczady Mountains learning gardening through trial and error (mostly error). After hours, I'm building Zielna Manufaktura — a Polish app for hobby gardeners, originally conceived by my wife Magda. Quality control is overseen by our cat Cirí.
What already works in the app: database of about 100 plants calibrated for the Polish climate, sowing calendar, bed planner, light meter, weather alerts, push notifications, gardening journal, AI-powered plant and disease scanner, and community blog. During beta, everything is free — no fees, no paywall.
I'm currently looking for Android testers. Google Play has one annoying requirement before public release: 12 people must be enrolled in testing simultaneously for 14 consecutive days. Uninstalling the app doesn't remove you from testing — only explicitly clicking "Opt out" on the testing page counts, so you can safely have it installed as long as you want. If you'd like to help and get the app with lifetime Premium for being a Founding Tester — go to zielnamanufaktura.pl/download. Any feedback is worth its weight in gold, and criticism is more welcome than praise.
Photo Gallery 5
Comments 0
No comments yet. Be the first!